How to Deploy and Self-Host Directus CMS using Docker Container + Nginx Reverse Proxy
Take complete ownership of your data stack by self-hosting Directus CMS with Docker Compose, PostgreSQL, Redis, and free Let's Encrypt SSL.
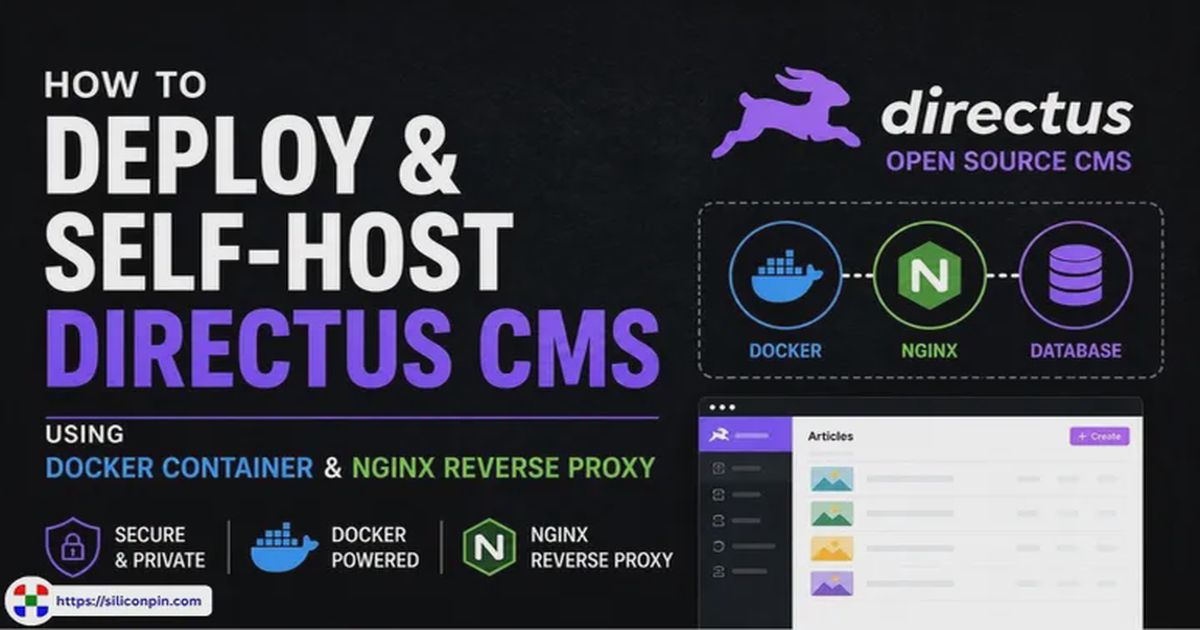
Most headless CMS platforms force your data into proprietary database structures and rigid schema abstractions. Directus works differently. It functions as an open-source data engine that sits directly on top of your existing relational database, inspecting your tables in real time to generate production-ready REST and GraphQL APIs alongside an admin Data Studio.
If you want full infrastructure control, self-hosting Directus gives you complete data privacy, custom extension support, and zero vendor lock-in.
This guide walks you through deploying Directus in production on any Linux server (such as Ubuntu, Debian, or Alpine) using Docker Compose, PostgreSQL 16, Redis caching, Nginx, and free Let’s Encrypt SSL certificates.
Why Self-Host Directus? Core Benefits
Self-hosting Directus on your own infrastructure offers several major engineering and business advantages over proprietary SaaS content platforms:
- Direct SQL Database Mirroring (Zero Vendor Lock-In): Directus does not hide your data behind custom proprietary database schemas or proprietary ORMs. It mirrors your existing PostgreSQL, MySQL, or MS SQL tables directly. If you ever decide to remove Directus, your underlying database remains clean, standard SQL.
- Predictable Cost & Unlimited Scale: SaaS headless CMS platforms bill you per API request, per content item, or per admin user. Self-hosting Directus means your operational costs remain tied strictly to your VPS hardware resources, regardless of whether you serve 10,000 or 10,000,000 API calls per month.
- Full Data Sovereignty & Strict Compliance: By hosting Directus on your own private cloud or on-premise servers, you maintain complete custody over your data. This is essential for organizations adhering to GDPR, HIPAA, SOC2, or strict internal data governance rules.
- Unlimited Extensibility: Self-hosting allows you to install custom Node.js extensions, custom API endpoints, custom display interfaces, and custom event hooks directly into your deployment directory without platform restrictions.
1. Understanding Directus Licensing: From Open Source to MSCL
Before setting up your server, it’s important to understand how Directus handles licensing for self-hosted instances. Directus is widely chosen because it is a free, self-hostable data platform, but its licensing model has evolved over time to balance open access with project sustainability.
The Licensing Evolution: BSL to MSCL
- Transition at Version 10.0.0: On April 26, 2023, Directus introduced a source-available license starting with Directus version 10.0.0, moving away from fully permissive open-source terms for certain commercial use cases by adopting the Business Source License (BSL).
- Current Licensing Model (MSCL): Directus has since evolved its structure to the Monospace Sustainable Core License (MSCL) (currently governing Directus v12). This model ensures the core platform remains free for most self-hosters while monetizing large-scale enterprise deployments.
Core Tier vs. Open Innovation Grant (OIG) Comparison
The table below breaks down the specific feature caps, licensing keys, and eligibility across Directus self-hosting tiers:
| Feature / Capability | Core Tier (Free, No Key) | Open Innovation Grant (OIG) (Free Key) | Enterprise Tier (Paid Key) |
|---|---|---|---|
| Eligibility Threshold | Available to everyone | Revenue < $5M USD & < 50 Employees | Revenue > $5M USD or > 50 Employees |
| License Key Required? | ❌ No registration key needed | ✅ Free registration key required | ✅ Paid commercial key required |
| User Seats Limit | Max 3 Admin Seats | Unlimited Seats | Unlimited Seats |
| Collection Cap | Max 50 Collections | Unlimited Collections | Unlimited Collections |
| Single Sign-On (SSO) | ❌ Standard Auth Only | ✅ OAuth2, OpenID, SAML, LDAP | ✅ OAuth2, OpenID, SAML, LDAP |
| RBAC Permissions | Basic Role Rules | Advanced Field & Filter Rules | Advanced Field & Filter Rules |
| Allowed Concurrent URLs | N/A (Local / Self-hosted) | Up to 5 Static Domains per key | Custom / Flexible |
Key Takeaway: If your business makes under $5,000,000 USD in annual revenue and has under 50 employees, requesting a free OIG key from the Directus website unlocks the full, unrestricted platform for free.
2. Directus Architecture Explained
Understanding how Directus handles data flow makes debugging and scaling much easier down the road.
Rather than running as a standalone content engine with its own internal data structures, Directus acts as a Database Mirroring Engine.
┌────────────────────────────────────────────────────────┐
│                      Client / App                      │
└──────────────────────────┬─────────────────────────────┘
                           │ (REST / GraphQL / WebSockets)
                           ▼
┌────────────────────────────────────────────────────────┐
│             Nginx Reverse Proxy (SSL)                  │
└──────────────────────────┬─────────────────────────────┘
                           │ (HTTP Port 8055)
                           ▼
┌────────────────────────────────────────────────────────┐
│            Directus API (Node.js Engine)               │
│  ┌───────────────────────┴──────────────────────────┐  │
│  │                Redis Cache Engine                │  │
│  └──────────────────────────────────────────────────┘  │
└──────────────────────────┬─────────────────────────────┘
                           │ (Native Database Protocol)
                           ▼
┌────────────────────────────────────────────────────────┐
│               PostgreSQL Database Layer                │
└──────────────────────────┬─────────────────────────────┘
The system comprises four core layers:
- Database Layer: Directus sits directly on top of your SQL schema. If you execute a raw SQL migration to add a column or table, Directus detects the schema update instantly without sync delays.
- API Engine (Node.js): Generates REST and GraphQL endpoints dynamically based on your database tables, handles JWT authentication, processes uploads, and manages WebSocket connections.
- Admin Data Studio (Vue.js): A decoupled Single-Page Application (SPA) that consumes the generated REST API to provide a no-code management interface for team members.
- Cache Layer (Redis): Caches schema metadata, role permissions, and frequent API queries to reduce database read load and lower response latencies.
3. System & Hardware Requirements
Here are the baseline requirements for running a self-hosted Directus instance on Linux:
Recommended Hardware Specs
- Testing / Development: 1 vCPU, 1 GB RAM, 10 GB NVMe/SSD.
- Production Standard: 2 vCPUs, 2 GB RAM (4 GB recommended if processing heavy asset transformations or running custom extensions), 20+ GB NVMe/SSD.
- Media Storage: If your application handles large image galleries or high-definition video, route storage to an external S3-compatible service (such as AWS S3 or Cloudflare R2).
Software & Network Prerequisites
- Operating System: Any modern Linux distribution (Ubuntu 22.04/24.04, Debian 12, Alpine, RHEL, etc. - Debian/Ubuntu commands used in examples).
- Supported Databases: PostgreSQL 12+ (recommended for production), MySQL 8+, MS SQL Server, or SQLite (dev/homelab only).
- Firewall Rules: Open public HTTP (
80) and HTTPS (443) ports. Ensure internal container ports (8055for Directus,5432for PostgreSQL) remain blocked from external access.
4. Server Preparation & Docker Setup
Start by logging into your server over SSH:
ssh root@your_server_ip
Update your system packages and install prerequisites:
# Update existing packages
sudo apt update && sudo apt upgrade -y

# Install required system tools
sudo apt install -y curl ca-certificates gnupg lsb-release
Why Deploy Directus with Docker?
Containerizing Directus using Docker Compose provides significant production advantages over bare-metal Node.js installations:
- Eliminates Node Environment Mismatches: Directus runs in an isolated container image bundled with its exact Node.js runtime dependencies, avoiding conflicts with system-installed Node packages.
- Private Network Isolation: Docker Compose links Directus, PostgreSQL, and Redis inside a private internal virtual bridge network (
directus_network). Database ports (5432) and cache ports (6379) are completely isolated from the host server’s public network interface. - Atomic Version Upgrades & Quick Rollbacks: Upgrading Directus requires running
docker compose pulland restarting the stack. If a new release exhibits issues, rolling back to the previous image tag takes seconds. - Unprivileged Non-Root Execution: The official Directus container runs under an unprivileged user (
nodewith UID1000), restricting the blast radius if an application vulnerability occurs.
Installing Docker Engine & Docker Compose V2
Add Docker’s official GPG key and package repository:
# Add Docker GPG key
sudo install -m 0755 -d /etc/apt/keyrings
curl -fsSL https://download.docker.com/linux/ubuntu/gpg | sudo gpg --dearmor -o /etc/apt/keyrings/docker.gpg
sudo chmod a+r /etc/apt/keyrings/docker.gpg

# Register Docker repository
echo \
  "deb [arch=$(dpkg --print-architecture) signed-by=/etc/apt/keyrings/docker.gpg] https://download.docker.com/linux/ubuntu \
  $(lsb_release -cs) stable" | sudo tee /etc/apt/sources.list.d/docker.list > /dev/null
Install Docker Engine and Docker Compose V2:
sudo apt update
sudo apt install -y docker-ce docker-ce-cli containerd.io docker-buildx-plugin docker-compose-plugin

# Verify installation
docker compose version
5. Project Directory & Host File Permissions
Create a main deployment folder on your host machine to store configuration files, upload directories, and custom extensions:
mkdir -p /opt/directus
cd /opt/directus
mkdir -p uploads extensions
Fixing File Ownership (UID 1000 Pitfall)
The official Directus Docker image drops root privileges and runs as an unprivileged container user (node with UID/GID 1000). If you create the uploads and extensions directories while logged in as root, the Directus container will fail to write uploaded files, causing immediate runtime errors during media uploads.
Grant container owner rights to these host directories:
sudo chown -R 1000:1000 uploads extensions
Generating Random Application Secrets
Directus uses KEY for telemetry identification and SECRET for signing authentication tokens and session cookies. Generate two distinct 64-character hex keys:
openssl rand -hex 32
openssl rand -hex 32
Save these output strings; you will paste them into your environment file.
6. Configuring Environment Variables (.env)
Create the .env configuration file inside /opt/directus:
nano .env
Paste in the following production settings, making sure to replace placeholder domains, generated keys, database credentials, and email settings:
# ===================================================
# Main Project Settings
# ===================================================
PUBLIC_URL="https://api.yourdomain.com"
KEY="your_first_generated_64_char_hex_secret"
SECRET="your_second_generated_64_char_hex_secret"

# Directus v12 License Key (OIG or Enterprise)
# Leave empty to run on the free Core tier (3 seats, 50 collections limit)
LICENSE_KEY="your_license_key_if_applicable"

# ===================================================
# Master Admin Credentials
# ===================================================
ADMIN_EMAIL="[email protected]"
ADMIN_PASSWORD="UseAStrongProductionPassword987!"

# ===================================================
# Database Connection (PostgreSQL)
# ===================================================
DB_CLIENT="pg"
DB_HOST="database"
DB_PORT="5432"
DB_DATABASE="directus"
DB_USER="directus_user"
DB_PASSWORD="UseAStrongDatabasePassword456!"

# ===================================================
# Cache Configuration (Redis)
# ===================================================
CACHE_ENABLED="true"
CACHE_STORE="redis"
CACHE_REDIS="redis://cache:6379"

# ===================================================
# Email Configuration (SMTP)
# ===================================================
EMAIL_TRANSPORT="smtp"
EMAIL_FROM="[email protected]"
EMAIL_SMTP_HOST="smtp.mailgun.org"
EMAIL_SMTP_PORT="587"
EMAIL_SMTP_USER="[email protected]"
EMAIL_SMTP_PASSWORD="your_smtp_password"
EMAIL_SMTP_SECURE="false"

# ===================================================
# Security & Upload Payload Configuration
# ===================================================
CORS_ENABLED="true"
CORS_ORIGIN="true"
MAX_PAYLOAD_SIZE="50mb"

# ===================================================
# Storage Settings (Local Disk)
# ===================================================
STORAGE_LOCATIONS="local"
STORAGE_LOCAL_ROOT="/directus/uploads"

# ===================================================
# Storage Settings (Optional S3 / Cloudflare R2)
# ===================================================
# STORAGE_LOCATIONS="s3"
# STORAGE_S3_DRIVER="s3"
# STORAGE_S3_KEY="your_r2_access_key_id"
# STORAGE_S3_SECRET="your_r2_secret_access_key"
# STORAGE_S3_BUCKET="your_bucket_name"
# STORAGE_S3_ENDPOINT="https://<account_id>.r2.cloudflarestorage.com"
# STORAGE_S3_REGION="us-east-1"
Important Notes:
PUBLIC_URLmust match your actual public HTTPS endpoint. Directus uses this variable for link construction, password resets, OAuth callbacks, and license activation validation.- If your passwords include special characters like
$,#,!, or quotes, wrap them in double quotes within.envto prevent Docker Compose variable parsing issues.
7. Building the docker-compose.yml File
Create your docker-compose.yml file:
nano docker-compose.yml
Add the container configuration below, defining PostgreSQL 16, Redis 7, and Directus:
services:
  database:
    image: postgres:16-alpine
    container_name: directus_db
    restart: unless-stopped
    environment:
      POSTGRES_DB: ${DB_DATABASE}
      POSTGRES_USER: ${DB_USER}
      POSTGRES_PASSWORD: ${DB_PASSWORD}
    volumes:
      - pg_data:/var/lib/postgresql/data
    networks:
      - directus_network
    healthcheck:
      test: ["CMD-SHELL", "pg_isready -U ${DB_USER} -d ${DB_DATABASE}"]
      interval: 10s
      timeout: 5s
      retries: 5

  cache:
    image: redis:7-alpine
    container_name: directus_cache
    restart: unless-stopped
    networks:
      - directus_network

  directus:
    image: directus/directus:latest
    container_name: directus_app
    restart: unless-stopped
    ports:
      - "127.0.0.1:8055:8055"
    depends_on:
      database:
        condition: service_healthy
      cache:
        condition: service_started
    env_file:
      - .env
    volumes:
      - ./uploads:/directus/uploads
      - ./extensions:/directus/extensions
    networks:
      - directus_network

volumes:
  pg_data:

networks:
  directus_network:
    driver: bridge
Key Configuration Choices Explained
pg_dataVolume: Named Docker volumes protect PostgreSQL data from permission anomalies common with raw directory mounts on Linux hosts.127.0.0.1:8055:8055Loopback Binding: Binding Port 8055 strictly to127.0.0.1ensures external internet traffic cannot bypass Nginx to reach the Directus application directly.- PostgreSQL Healthcheck: Directus automatically runs schema migrations on launch.
condition: service_healthykeeps Directus paused until PostgreSQL is up and accepting connections, preventing boot crash loops. - Redis Volatility: Redis operates purely as a transient cache layer. Container restarts will not affect core data stored in PostgreSQL.
8. Bootstrapping and Starting Directus
Launch the service stack in background mode:
docker compose up -d
Docker will download the required images, create the network bridge, and initialize the database containers.
Follow startup logs to watch schema migrations and initialization finish:
docker compose logs -f directus
Once you see the following log entry, Directus is up:
[INFO] Server started at http://0.0.0.0:8055
Press Ctrl + C to exit log streaming.
9. Setting Up Nginx Reverse Proxy & Let’s Encrypt SSL
To serve Directus securely over HTTPS, configure Nginx to proxy incoming web traffic to container port 8055.
1. Install Nginx and Certbot
sudo apt install -y nginx certbot python3-certbot-nginx
2. Configure the Nginx Server Block
Create a dedicated Nginx configuration file:
sudo nano /etc/nginx/sites-available/directus
Paste the server configuration below, replacing api.yourdomain.com with your subdomain:
server {
    server_name api.yourdomain.com;

    # Set maximum client upload body size to match your .env setting
    client_max_body_size 50M;

    location / {
        proxy_pass http://127.0.0.1:8055;
        proxy_http_version 1.1;

        # WebSocket support for Directus real-time subscriptions
        proxy_set_header Upgrade $http_upgrade;
        proxy_set_header Connection "upgrade";

        # Proxy header forwarding
        proxy_set_header Host $host;
        proxy_set_header X-Real-IP $remote_addr;
        proxy_set_header X-Forwarded-For $proxy_add_x_forwarded_for;
        proxy_set_header X-Forwarded-Proto $scheme;

        # Timeout configurations for long migrations and heavy workloads
        proxy_connect_timeout 60s;
        proxy_send_timeout 60s;
        proxy_read_timeout 60s;
    }
}
Enable the configuration, test for syntax errors, and reload Nginx:
sudo ln -s /etc/nginx/sites-available/directus /etc/nginx/sites-enabled/
sudo nginx -t
sudo systemctl reload nginx
3. Provision Free SSL with Certbot
Obtain an SSL certificate using Certbot:
sudo certbot --nginx -d api.yourdomain.com
Select the option to automatically redirect HTTP traffic to HTTPS. Certbot will update your Nginx config automatically.
Run a dry-run renewal test to confirm systemd timers will auto-renew your certificates:
sudo certbot renew --dry-run
10. Verifying the Installation
Open your browser and navigate to:
https://api.yourdomain.com
You will see the Directus login interface. Log in using the ADMIN_EMAIL and ADMIN_PASSWORD defined in your .env file.
To verify API operation, access the health endpoint:
https://api.yourdomain.com/server/ping
A healthy instance returns:
{
  "status": 200,
  "message": "pong"
}
11. Security Features & Infrastructure Hardening
Directus includes built-in security features to protect your data, but securing a self-hosted instance also requires hardening your server infrastructure.
Native Directus Security Capabilities
- Granular Role-Based Access Control (RBAC): Define explicit permissions for Create, Read, Update, and Delete operations down to specific collections, individual fields, or conditional row-level rules (e.g., users can only view records where
author_id = $CURRENT_USER). - Multi-Factor Authentication (MFA / 2FA): Built-in support for Time-based One-Time Passwords (TOTP) compatible with Google Authenticator, Authy, or 1Password. MFA can be enforced per user or mandated globally for specific administrative roles.
- Argon2id Password Hashing & JWT Security: User credentials are encrypted using Argon2id (or Bcrypt). API authentication relies on short-lived JWT access tokens paired with secure HTTP-only refresh cookies.
- Built-In API Rate Limiting: Protect your endpoints against brute-force attacks and DDoS by enabling rate limiting in
.env:CONFIGRATE_LIMIT_ENABLED="true" RATE_LIMIT_POINTS="100" # Max 100 requests RATE_LIMIT_DURATION="1m" # Per 1 minute window
Server & Infrastructure Security Best Practices
- Configure UFW Firewall: Restrict incoming server connections to essential web ports only:
sudo ufw default deny incoming
sudo ufw default allow outgoing
sudo ufw allow 22/tcp    # SSH
sudo ufw allow 80/tcp    # HTTP
sudo ufw allow 443/tcp   # HTTPS
sudo ufw enable
- Restrict CORS Origins: In production, avoid using
CORS_ORIGIN="true". Restrict CORS to your exact frontend web domain in.env:
CORS_ORIGIN="https://yourfrontend.com"
- Isolate Database Access: Always bind Directus container ports to loopback (
127.0.0.1:8055:8055) and keep PostgreSQL port5432closed to the external internet.
12. Role-Based Access Control & API Tokens
By default, Directus restricts public access to all database collections. You can grant access and set up API credentials directly inside the Data Studio.
Exposing Public Data
If you are building a public website, blog, or mobile app, configure read permissions for unauthenticated users:
- Go to Settings > Roles & Permissions > Public.
- Locate your collection under Collections.
- Set permissions under the Read column to All Access (or define custom field/filter rules).
- Save your changes. Anonymous client requests can now query these endpoints.
Static API Tokens for Applications
Avoid passing master admin credentials in application code. Instead, issue restricted API tokens:
- Go to Settings > Roles & Permissions and select Create Role.
- Name the role (e.g.,
Frontend Web Application) and set explicit CRUD rules. - Go to Settings > Users and select Create User.
- Assign this user to your new role.
- In the Token field, enter a secure random static string and save.
- Pass this token in your client request headers:
Authorization: Bearer <your_static_token>
13. Performance Tuning (Redis & Memory)
For production environments serving high traffic, fine-tune caching and container memory allocation.
Tuning Redis Behavior
You can adjust Redis cache behavior via environment variables in .env:
CACHE_TTL="5m": Defines how long cached data remains stored in memory.CACHE_AUTO_PURGE="true": Automatically invalidates related query caches whenever collection items are modified, ensuring clients always receive fresh data.
Adjusting Node.js Memory Limits
Node.js applications running inside resource-constrained containers may encounter Out of Memory (OOM) errors during bulk asset operations. Allocate explicit heap space in docker-compose.yml:
  directus:
    # ...
    environment:
      NODE_OPTIONS: "--max-old-space-size=2048" # Allocates 2GB Node heap memory
14. Ongoing Infrastructure Management & Maintenance
Managing a production Directus stack requires routine day-two operations like applying updates, rotating log files, and performing database maintenance.
Updating Directus Safely
When a new Directus image release is published, follow this zero-downtime update workflow:
- Back up your database: Run a
pg_dumpbefore updating. - Pull updated images:
docker compose pull
- Execute database migrations:
docker compose run --rm directus database migrate:latest
- Recreate containers:
docker compose up -d
- Verify health: Check container logs (
docker compose logs -f directus) and test API routes.
Docker Container Log Rotation
By default, Docker container logs can grow indefinitely and fill up server disk space (/var/lib/docker). Configure daemon log rotation by creating /etc/docker/daemon.json:
{
  "log-driver": "json-file",
  "log-opts": {
    "max-size": "10m",
    "max-file": "3"
  }
}
Restart Docker to apply log rotation:
sudo systemctl restart docker
PostgreSQL Database Maintenance
Run routine PostgreSQL index and query optimization periodically inside the database container:
docker exec -it directus_db vacuumdb -U directus_user -d directus --analyze
15. Troubleshooting Deployment Issues
Here are solutions to common self-hosted infrastructure issues:
1. Nginx 502 Bad Gateway
- Verify container status: Run
docker compose psto confirmdirectus_appis running. - Check local port binding: Ensure your
docker-compose.ymlmaps port127.0.0.1:8055:8055. If changed, update Nginxproxy_pass. - Review application logs: Run
docker compose logs directusto check Node process output.
2. Database Connection Failures
- Check environment variables: Confirm that
.envDB variables (DB_DATABASE,DB_USER,DB_PASSWORD) match the PostgreSQL container settings (POSTGRES_DB,POSTGRES_USER,POSTGRES_PASSWORD). - Check DB readiness: Run
docker compose exec database pg_isready -U directus_user -d directus.
3. File Upload / EACCES Permission Denied Errors
- Confirm that host directories are owned by user ID 1000:
ls -la /opt/directus
If directories are owned by root, re-apply ownership:
sudo chown -R 1000:1000 /opt/directus/uploads /opt/directus/extensions
4. Running Migrations Manually
If database migrations fail or hang during a version upgrade, run the migration command manually inside a transient container:
docker compose run --rm directus database migrate:latest
After migrations complete, restart the main application:
docker compose up -d
16. Backups, Restores, & Disaster Recovery
A production deployment requires regular automated backups of both the PostgreSQL database and uploaded files.
1. Automated PostgreSQL Backups
Create a backup folder on your host:
mkdir -p /opt/backups
Open crontab:
crontab -e
Add a scheduled nightly job to dump the database at 2:00 AM:
0 2 * * * docker exec directus_db pg_dump -U directus_user directus > /opt/backups/directus_$(date +\%F).sql
Note: The backslash before
%F(\%F) is required in crontab syntax to prevent cron from interpreting%as a newline.
Restoring the Database
- Stop the Directus application container to prevent write operations:
docker compose stop directus
- Restore your SQL dump:
docker exec -i directus_db psql -U directus_user -d directus < /opt/backups/directus_2026-08-15.sql
- Restart Directus:
docker compose start directus
2. Upload Asset Backups
Backup media uploads stored in /opt/directus/uploads:
tar -czf /opt/backups/uploads_$(date +%F).tar.gz -C /opt/directus uploads
To restore media uploads from an archive:
tar -xzf /opt/backups/uploads_2026-08-15.tar.gz -C /opt/directus/
17. Don’t Want to Manage Infrastructure? (Managed Option)
Self-hosting Directus requires managing server security, firewall rules, Docker Compose stacks, Let’s Encrypt SSL renewals, PostgreSQL database backups, and Redis cache tuning.
If you prefer a managed option without maintaining underlying Linux servers, you can host Directus using SiliconPin Directus Cloud Hosting. Powered by rootless SiliconPin Pods, it provides managed PostgreSQL sidecars, Redis caching, automatic SSL, and instant snapshot backups (sp backup).
Quick Deployment via sp CLI:
# 1. Install sp CLI & authenticate
curl -fsSL https://siliconpin.com/downloads/sp/install.sh | bash
sp login --token=$SP_TOKEN

# 2. Deploy Directus pod & attach PostgreSQL sidecar
sp deploy --name=<application-name> --port=8055
sp deployments attach db postgresql <deployment-id>

# 3. Configure environment variables
sp env set KEY=your_generated_key_here
sp env set SECRET=your_generated_secret_here
sp env set PUBLIC_URL=https://directus-app.yourname.sp.net
sp env set ADMIN_EMAIL=[email protected]
sp env set ADMIN_PASSWORD=ChooseAStrongAdminPassword123!

# 4. Optional: Snapshot backups & local HTTPS tunneling
sp backup <deployment-id>
sp tunnel 8055
18. Frequently Asked Questions
Can I run SQLite in production instead of PostgreSQL?
While Directus supports SQLite for prototyping or local homelabs, SQLite is not suited for production deployments. It lacks concurrent write performance and table locking efficiency under load. Use PostgreSQL or MySQL for production.
How do I install custom Directus extensions?
Place compiled extension packages inside /opt/directus/extensions. Because this host folder is mounted inside the container via docker-compose.yml, Directus scans and loads new extensions upon restart:
docker compose restart directus
How do I fix CORS errors on the frontend?
CORS errors stem from misconfigured origin headers. In .env:
- Verify
PUBLIC_URLmatches your domain (e.g.https://api.yourdomain.com). - Confirm
CORS_ENABLED="true". - Set
CORS_ORIGINtotruefor open APIs, or set it explicitly to your frontend domain (e.g.https://yourfrontend.com).
How do I increase file upload payload limits?
To allow file uploads larger than 50MB, update limits in two places:
- Increase
MAX_PAYLOAD_SIZE="100mb"in.env. - Increase
client_max_body_size 100M;in/etc/nginx/sites-available/directus.
Reload Nginx (sudo systemctl reload nginx) and restart Directus containers.
Does Directus v12 support AI integrations (MCP)?
Yes. Directus v12 includes native support for Model Context Protocol (MCP). This enables AI clients (such as Claude or Cursor) to query your Directus schemas and data while strictly enforcing your defined RBAC permissions. MCP options can be managed in Project Settings.
How do license activations work under the Open Innovation Grant?
OIG license keys bind directly to your domain (PUBLIC_URL). A standard OIG key allows up to 5 concurrent domain activations. If you run ephemeral CI/CD environments that spin up temporary URLs, run staging environments on the free Core tier to avoid using up activation slots.
19. Summary
You now have a production-ready, self-hosted Directus instance running on Linux. Your installation features:
- Automated container orchestration via Docker Compose V2.
- Persistent PostgreSQL 16 database storage.
- High-performance Redis query and schema caching.
- Reverse proxying through Nginx with free Let’s Encrypt SSL certificates.
- Native RBAC, 2FA, Argon2id security, and infrastructure hardening.
- Day-two maintenance workflows (container updates, log rotation, and database optimization).
- Automated nightly database and asset backup workflows.
From here, log into your Data Studio, create your database collections, set up user permissions, and start building your applications with auto-generated REST and GraphQL APIs.
Subhodip Ghosh
Engineering, systems programming, and curated technology insights.