Step-by-Step: Deploying a Node.js App with Zero-Downtime Using Git Hooks
A step-by-step guide to setting up an automated, zero-downtime Node.js deployment pipeline using server-side Git post-receive hooks, PM2 Cluster Mode (pm2 reload), and an Nginx reverse proxy with free SSL.
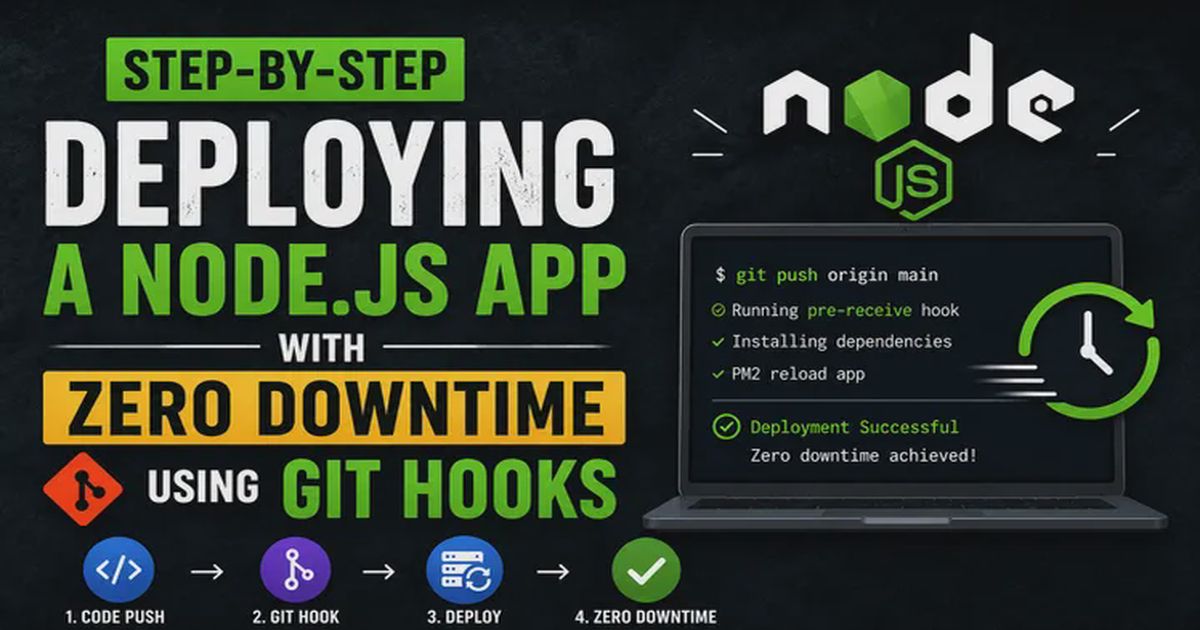
We’ve all been there: it’s late afternoon, you push a quick hotfix to your production VPS, SSH into the box, run git pull, execute npm install, and restart your application process.
And then, for a few stressful seconds—or longer if npm install decides to build dependencies—your users hit a 502 Bad Gateway. Active API requests get dropped, WebSocket connections break, and Slack alerts start firing.
Manual SSH commands and process restarts might pass for weekend side-projects, but in production, dropping traffic every time you ship code is painful.
Zero-downtime deployment solves this by swapping out your old application code for the new version seamlessly, without dropping active connections. The best part? You don’t need Kubernetes, complex Docker orchestration, or heavy CI/CD servers just to deploy a single Node.js app safely.
By pairing a server-side Git hook with PM2 Cluster Mode, you get an automated, push-to-deploy pipeline that reloads your app with zero downtime every time you run git push production main.
NOTETL;DR for Backend Engineers & DevOps: You can skip setting up external CI/CD platforms for small-to-medium Node.js services. Set up a Git bare repository on your server with a
post-receivehook that checks out code into/var/www/and triggerspm2 reload. PM2’s cluster mode handles rolling process updates in the background with zero dropped requests.
1. How Git Hooks + PM2 Work Together
Here is a quick look at how code flows from your laptop to the production server when you push changes:
                       Git Hooks + PM2 Zero-Downtime Deployment Flow
 +-------------------+        SSH (Git Protocol)         +---------------------------------------+
 | Local Machine     | --------------------------------> | Production Linux Server               |
 | (Developer Work)  |   git push production main        |                                       |
 +-------------------+                                   |  +---------------------------------+  |
                                                         |  | Bare Repository                 |  |
                                                         |  | (/var/repo/my-app.git)          |  |
                                                         |  +---------------------------------+  |
                                                         |                  |                    |
                                                         |                  v (Fires Hook)       |
                                                         |  +---------------------------------+  |
                                                         |  | hooks/post-receive Bash Script  |  |
                                                         |  +---------------------------------+  |
                                                         |                  |                    |
                                                         |    1. git checkout -f main            |
                                                         |    2. npm ci --only=production        |
                                                         |    3. pm2 reload my-app               |
                                                         |                  v                    |
                                                         |  +---------------------------------+  |
                                                         |  | Working Directory               |  |
                                                         |  | (/var/www/my-app)               |  |
                                                         |  +---------------------------------+  |
                                                         |                  |                    |
                                                         |                  v                    |
                                                         |  +---------------------------------+  |
                                                         |  | PM2 Cluster Manager             |  |
                                                         |  |  [Worker 1] (Old - Terminating) |  |
                                                         |  |  [Worker 2] (New - Active)      |  |
                                                         |  +---------------------------------+  |
 +-------------------+                                   +---------------------------------------+
 | Active Web Client | -----------------------------------------------------^ (Zero Dropped Requests)
 +-------------------+
Why pm2 reload Doesn’t Drop Traffic
When you run pm2 restart, PM2 kills your application process immediately and then boots up a new instance. During those few seconds while Node initializes and connects to your database, any incoming HTTP request hits a closed port.
pm2 reload works completely differently. It uses Node’s native cluster module to perform a rolling reload across worker processes:
- PM2 starts a new worker process running your fresh code alongside the existing workers.
- It waits for the new worker to spin up and report that it’s listening for traffic.
- Once confirmed healthy, PM2 sends a graceful
SIGINTto an old worker, allowing it to finish processing current requests before shutting down. - It repeats this process worker-by-worker. At no point is the server offline or unavailable.
2. Step 1: Setting Up Your Server Directories
What You’ll Need
Make sure your Ubuntu/Debian or RHEL server has:
- Node.js (v18 or v20 LTS)
- Git (
sudo apt update && sudo apt install -y git) - PM2 installed globally (
sudo npm install -g pm2)
Separating the Repository from the Live App
A common mistake is pulling code directly into /var/www/my-app with .git sitting in the live directory. That gets messy quickly with permissions, build files, and local file changes.
Instead, split your setup into two clean directories:
- Bare Repository (
/var/repo/my-app.git): The remote endpoint where you push code. It stores Git objects and hooks, but no editable project files. - Working Directory (
/var/www/my-app): Where the actual Node.js app runs, holdsnode_modules, and loads environment variables.
Run these commands on your server to set up both directories and assign ownership to your SSH user:
# Create directories
sudo mkdir -p /var/repo/my-app.git
sudo mkdir -p /var/www/my-app

# Give ownership to your SSH deployment user (replace 'deploy' with your username)
sudo chown -R $USER:$USER /var/repo
sudo chown -R $USER:$USER /var/www
3. Step 2: Creating the Git Bare Repo & Hook
Initialize the Bare Repo
Head into your repo directory and run git init --bare:
cd /var/repo/my-app.git
git init --bare
If you look inside, you’ll see folders like objects, refs, and hooks—no source code files.
Setting Up the post-receive Hook
Git hooks are Bash scripts triggered by Git events. The post-receive hook fires automatically on the server right after a successful git push.
Navigate to the hooks directory and create the script:
cd /var/repo/my-app.git/hooks
touch post-receive
chmod +x post-receive
IMPORTANTDon’t forget
chmod +x post-receive. If the file isn’t executable, Git will accept your push but silently ignore the script.
4. Step 3: Writing the post-receive Deployment Script
Open /var/repo/my-app.git/hooks/post-receive in your editor (nano post-receive) and paste in this script:
#!/bin/bash
set -e # Exit immediately if any step fails

# ==============================================================================
# ENVIRONMENT & PATH FIXES
# ==============================================================================
# Non-interactive SSH sessions often run with a bare-minimum $PATH.
# Explicitly set paths so Git can find node, npm, and pm2.
export PATH=$PATH:/usr/local/bin:/usr/bin:/bin
if [ -d "$HOME/.nvm/versions/node" ]; then
    NODE_LATEST=$(ls $HOME/.nvm/versions/node | tail -n 1)
    export PATH=$HOME/.nvm/versions/node/$NODE_LATEST/bin:$PATH
fi

# Directory locations
TARGET="/var/www/my-app"
GIT_DIR="/var/repo/my-app.git"
APP_NAME="my-node-app"

echo "=========================================="
echo "🚀 Starting Automated Deployment"
echo "=========================================="

# 1. Checkout latest main branch into the live directory
echo "📦 Checking out latest code into $TARGET..."
mkdir -p $TARGET
GIT_WORK_TREE=$TARGET git checkout -f main

# 2. Move to live app folder
cd $TARGET

# 3. Only run npm install if dependencies changed
if git diff --name-only HEAD@{1} HEAD 2>/dev/null | grep -qE 'package.json|package-lock.json'; then
    echo "📥 package.json updated. Installing production dependencies..."
    if [ -f "package-lock.json" ]; then
        npm ci --only=production
    else
        npm install --production
    fi
else
    echo "⏩ package.json unchanged. Skipping npm install!"
fi

# 4. Run Database Migrations Safely
if grep -q '"prisma"' package.json 2>/dev/null; then
    echo "🗄️ Running Prisma database migrations..."
    npx prisma migrate deploy
elif grep -q '"typeorm"' package.json 2>/dev/null; then
    echo "🗄️ Running TypeORM database migrations..."
    npx typeorm migration:run -d dist/data-source.js
elif grep -q '"sequelize"' package.json 2>/dev/null; then
    echo "🗄️ Running Sequelize database migrations..."
    npx sequelize-cli db:migrate
fi

# 5. Optional build step (TypeScript / React / Next.js)
if grep -q '"build":' package.json; then
    echo "🛠️ Running build script..."
    npm run build
fi

# 6. Reload PM2 cluster
echo "🔄 Reloading PM2 ($APP_NAME)..."
if pm2 describe $APP_NAME > /dev/null 2>&1; then
    pm2 reload $APP_NAME --update-env
    echo "✅ PM2 cluster reloaded with zero downtime!"
else
    echo "⚡ Application not running in PM2 yet. Performing initial start..."
    if [ -f "ecosystem.config.js" ]; then
        pm2 start ecosystem.config.js --env production
    else
        pm2 start index.js --name $APP_NAME -i max
    fi
    pm2 save
    echo "✅ PM2 cluster started!"
fi

echo "=========================================="
echo "🎉 Deployment Finished Successfully!"
echo "=========================================="
Zero-Downtime Database Migration Strategy
Running database migrations inside a deployment pipeline requires careful planning. If you run a migration that drops or renames a column while old PM2 worker instances are still processing requests, those active workers will crash with database query errors.
The Expand-Contract Pattern
To achieve zero downtime during schema changes, follow the Expand-Contract (Parallel Change) pattern:
- Step 1 (Expand): Add new columns or tables without deleting existing ones. (e.g., add
full_namewhile keepingfirst_nameandlast_name). - Step 2 (Deploy Code): Push updated code that writes to the new schema while falling back gracefully to the old schema.
- Step 3 (Contract): Once all old workers are reloaded and no traffic references the old columns, push a follow-up migration to remove old columns.
                  Expand-Contract Zero-Downtime Migration Steps
 [ Phase 1: Expand ]          [ Phase 2: Deploy Code ]         [ Phase 3: Contract ]
+---------------------+      +------------------------+      +---------------------+
| Add new column      | ---> | Deploy Node.js code    | ---> | Drop old column     |
| (Database accepts   |      | reading new column &   |      | (Database cleanup   |
| both old & new)     |      | writing both fields    |      | after full reload)  |
+---------------------+      +------------------------+      +---------------------+
Clean PM2 Config (ecosystem.config.js)
Add an ecosystem.config.js file to the root of your Node app so PM2 knows how to run your processes in cluster mode:
module.exports = {
  apps: [{
    name: 'my-node-app',
    script: './index.js',

    // Scale across all available CPU cores
    instances: 'max',
    exec_mode: 'cluster',

    // Wait for app readiness before cutting over traffic
    wait_ready: true,
    listen_timeout: 10000,
    kill_timeout: 5000,

    // Memory limit safeguard (auto-restart if worker exceeds 512MB RAM)
    max_memory_restart: '512M',

    env_production: {
      NODE_ENV: 'production',
      PORT: 3000
    }
  }]
};
Telling PM2 When Your App is Ready
In your index.js, send PM2 a readiness signal once your database connections and Express routes are ready:
const express = require('express');
const app = express();
const PORT = process.env.PORT || 3000;

app.get('/healthz', (req, res) => res.status(200).send('OK'));

const server = app.listen(PORT, () => {
  console.log(`Server running on port ${PORT}`);

  // Notify PM2 that this instance can safely accept live HTTP requests
  if (process.send) {
    process.send('ready');
  }
});

// Handle graceful shutdown signals from PM2 during rolling reloads
process.on('SIGINT', () => {
  console.log('SIGINT received. Closing HTTP server connections...');
  server.close(() => {
    console.log('HTTP server closed. Exiting process.');
    process.exit(0);
  });
});
5. Step 4: Connecting Your Local Machine & Pushing Code
With the server configured, jump back to your local machine terminal inside your project directory.
Add the Production Remote
Add your server repository as a Git remote:
git remote add production deploy@your-server-ip:/var/repo/my-app.git
(Swap deploy@your-server-ip with your actual server user and IP address).
Deploying Changes
Now, deploying your app is as simple as:
git push production main
Your terminal will display real-time logs from the server hook:
Enumerating objects: 10, done.
Counting objects: 100% (10/10), done.
Writing objects: 100% (6/6), 850 bytes | 850.00 KiB/s, done.
Total 6 (delta 3), reused 0 (delta 0)
remote: ==========================================
remote: 🚀 Starting Automated Deployment
remote: ==========================================
remote: 📦 Checking out latest code into /var/www/my-app...
remote: ⏩ package.json unchanged. Skipping npm install!
remote: 🗄️ Running Prisma database migrations...
remote: 🔄 Reloading PM2 (my-node-app)...
remote: [PM2] Applying action reloadProcessId on app [my-node-app]
remote: [PM2] [my-node-app](0) 👌
remote: [PM2] [my-node-app](1) 👌
remote: ✅ PM2 cluster reloaded with zero downtime!
remote: ==========================================
remote: 🎉 Deployment Finished Successfully!
remote: ==========================================
To your-server-ip:/var/repo/my-app.git
   e3f4a5b..c6d7e8f  main -> main
6. Step 5: Routing Web Traffic with Nginx & Free SSL
Your Node.js app is now running inside PM2 on port 3000. To serve public traffic safely over standard HTTP (80) and HTTPS (443) ports, put Nginx in front of PM2 as a reverse proxy.
1. Install Nginx
sudo apt update
sudo apt install -y nginx
2. Configure Nginx as a Reverse Proxy
Create a site configuration file in /etc/nginx/sites-available/my-app:
server {
    listen 80;
    server_name your-domain.com www.your-domain.com;

    location / {
        proxy_pass http://127.0.0.1:3000;
        proxy_http_version 1.1;

        # Forward client headers & WebSocket upgrades
        proxy_set_header Upgrade $http_upgrade;
        proxy_set_header Connection 'upgrade';
        proxy_set_header Host $host;
        proxy_set_header X-Real-IP $remote_addr;
        proxy_set_header X-Forwarded-For $proxy_add_x_forwarded_for;
        proxy_set_header X-Forwarded-Proto $scheme;
        proxy_cache_bypass $http_upgrade;
    }
}
Link the configuration to sites-enabled and test Nginx syntax:
sudo ln -s /etc/nginx/sites-available/my-app /etc/nginx/sites-enabled/
sudo nginx -t
sudo systemctl reload nginx
3. Provision Free SSL with Certbot (Let’s Encrypt)
Secure your site with automatic HTTPS using Certbot:
sudo apt install -y certbot python3-certbot-nginx
sudo certbot --nginx -d your-domain.com -d www.your-domain.com
Certbot will automatically update your Nginx configuration with TLS certificates and configure automatic 90-day renewals.
7. Real-World Gotchas & How to Fix Them
1. The “pm2: command not found” SSH Trap
Problem: Your local git push succeeds, but the remote log shows pm2: command not found.
Why it happens: Git opens a non-interactive SSH session to run hooks, which skips loading user shell files like ~/.bashrc or ~/.zshrc. If Node or PM2 was installed via NVM, their paths aren’t loaded into $PATH.
Fix: Keep the explicit $PATH exports at the top of your post-receive script, or symlink the binaries globally:
sudo ln -s $(which node) /usr/local/bin/node
sudo ln -s $(which pm2) /usr/local/bin/pm2
2. Managing .env Secrets Securely in Production
Problem: You don’t want secret keys checked into Git, but your production app needs secure access to environment variables.
Security Best Practices:
- Restrict File Permissions (
chmod 600): Ensure only the Linux application user can read.env:BASHsudo chmod 600 /var/www/my-app/.env sudo chown deploy:deploy /var/www/my-app/.env - Never Overwrite
.envin Hooks: Becausegit checkout -f mainonly updates files tracked in Git, your untracked.envfile in/var/www/my-app/remains completely safe and untouched during deployments. - Centralized Secret Managers (Enterprise): For team environments, avoid keeping
.envfiles on disk manually. Use secret managers like Infisical, Doppler, or AWS Secrets Manager to inject environment variables into PM2 at runtime:BASH# Example: Injecting Doppler secrets into PM2 doppler run -- pm2 reload ecosystem.config.js --env production
3. Permission Errors (EACCES / Permission denied)
Problem: Git fails to check out files or PM2 fails to write logs due to permission mismatches.
Fix: Make sure the SSH user you push with owns both the repository and the web directory:
sudo chown -R $USER:$USER /var/repo /var/www
4. How to Roll Back If a Deployment Breaks
If a commit introduces a bug in production, you have two quick options:
Method A: Revert Locally and Push (Recommended)
git revert HEAD
git push production main
Method B: Instant Server-Side Rollback
If you need to roll back instantly without touching your local machine:
# SSH into your server
cd /var/repo/my-app.git
GIT_WORK_TREE=/var/www/my-app git checkout -f HEAD~1

cd /var/www/my-app
pm2 reload my-node-app
8. PM2 Process Monitoring, Status & Log Management
Once your application is live, you need visibility into worker process health, CPU/RAM consumption, and application logs.
1. Checking PM2 Application Status
View running process clusters, uptime, restarts, CPU usage, and memory consumption:
# View summary table of active PM2 processes
pm2 status

# Open real-time interactive terminal dashboard (CPU, Memory, Event Loop latency)
pm2 monit
Sample output of pm2 status:
┌────┬────────────────┬─────────────┬─────────┬─────────┬──────────┬────────┬──────┬───────────┬───────────┬──────────┐
│ id │ name           │ namespace   │ mode    │ pid     │ status   │ restart│ cpu  │ memory    │ user      │ watching │
├────┼────────────────┼─────────────┼─────────┼─────────┼──────────┼────────┼──────┼───────────┼───────────┼──────────┤
│ 0  │ my-node-app    │ default     │ cluster │ 41205   │ online   │ 0      │ 0.1% │ 54.2mb    │ deploy    │ disabled │
│ 1  │ my-node-app    │ default     │ cluster │ 41212   │ online   │ 0      │ 0.0% │ 52.8mb    │ deploy    │ disabled │
└────┴────────────────┴─────────────┴─────────┴─────────┴──────────┴────────┴──────┴───────────┴───────────┴──────────┘
2. Inspecting Real-Time Application Logs
# Stream stdout and stderr logs in real time
pm2 logs

# View last 100 log lines for a specific app
pm2 logs my-node-app --lines 100

# Clear stored log files
pm2 flush
3. Preventing Disk-Full Crashes with pm2-logrotate
By default, PM2 appends all console.log output to ~/.pm2/logs/. On busy production servers, these log files grow to gigabytes and eventually crash your server with No space left on device.
Install and configure pm2-logrotate to automatically compress and rotate log files:
# Install logrotate module globally inside PM2
pm2 install pm2-logrotate

# Configure max log size to 10MB and keep a maximum of 10 rotated files
pm2 set pm2-logrotate:max_size 10M
pm2 set pm2-logrotate:retain 10
pm2 set pm2-logrotate:compress true
9. Node.js Scaling Strategies: From Single VPS to Multi-Server Topologies
Scaling a Node.js application requires understanding the difference between vertical scaling (optimizing single-server resources) and horizontal scaling (distributing load across multiple servers).
                      Node.js Architectural Scaling Stages
 [ Stage 1: Single Core ]       [ Stage 2: PM2 Cluster ]        [ Stage 3: Horizontal Load Balancing ]
+------------------------+     +------------------------+      +-------------------------------------+
| Node.js Event Loop     |     | PM2 Master Process     |      | Nginx / Cloud Load Balancer (ALB)   |
| (1 CPU Core Utilized)  | --> | Worker 1 | Worker 2    | -->  |  ├─ VPS 1 (PM2 Cluster)             |
|                        |     | (All CPU Cores Used)   |      |  └─ VPS 2 (PM2 Cluster)             |
+------------------------+     +------------------------+      +-------------------------------------+
1. Vertical Scaling (PM2 Cluster Mode)
Node.js runs single-threaded by default. On a 4-core server, a single Node process utilizes only 25% of total CPU capacity. PM2 Cluster Mode (instances: 'max') spawns 1 worker per CPU core, scaling throughput 4x vertically on the same machine without code changes.
2. Stateless Application Design
To scale horizontally across multiple VPS servers or containers, your Node.js application must be stateless:
- Session Storage: Do not store HTTP sessions in server memory (
express-sessionmemory store). Offload session tokens and user state to Redis (connect-redis). - File Uploads: Never save user avatars or uploaded images directly to the server disk
/var/www/my-app/uploads/. Upload files directly to S3, Cloudflare R2, or DigitalOcean Spaces.
3. Horizontal Scaling Across Multiple Servers
When a single VPS reaches hardware limits, place a cloud load balancer (AWS ALB, DigitalOcean Load Balancer, or standalone Nginx) in front of multiple application servers:
# Nginx Upstream Load Balancing across 2 VPS Nodes
upstream nodejs_cluster {
    least_conn; # Route incoming traffic to the server with fewest active connections
    server 192.168.1.10:3000 max_fails=3 fail_timeout=10s;
    server 192.168.1.11:3000 max_fails=3 fail_timeout=10s;
}

server {
    listen 80;
    server_name api.yourdomain.com;

    location / {
        proxy_pass http://nodejs_cluster;
        proxy_set_header Host $host;
        proxy_set_header X-Real-IP $remote_addr;
    }
}
10. Production Deployment Best Practices
Adhere to these core DevOps best practices when shipping Node.js services:
- Never Run as
rootUser: Run PM2 and Node under a dedicated, unprivileged Linux user (e.g.,deployornodeapp). If an attacker exploits a remote code execution (RCE) vulnerability in your app, running as unprivileged user prevents them from gaining system-wide root access. - Enforce
NODE_ENV=production: Ensures Express, React, and third-party libraries disable verbose debug logging, enable template caching, and run optimized code paths up to 3x faster. - Increase Linux File Descriptor Limits (
ulimit): High-traffic Node apps handling thousands of concurrent WebSocket or HTTP connections hit the default Linux limit (1024open files). Increase limits in/etc/security/limits.conf:TEXTdeploy hard nofile 65535 deploy soft nofile 65535 - Set Heap Memory Limits (
--max-old-space-size): Prevent CPython or V8 memory leaks from crashing the entire host server. Limit V8 heap size to match container/VPS RAM:JAVASCRIPT// ecosystem.config.js node_args: '--max-old-space-size=4096' // Limit Node heap to 4GB
11. Production Observability & Uptime Monitoring
Zero-downtime deployment is only half the battle. You need active monitoring to catch runtime errors, memory leaks, and performance degradations before users notice.
1. Health Check Endpoint (/healthz)
Expose a /healthz endpoint that tests critical dependencies (database query check, Redis ping):
app.get('/healthz', async (req, res) => {
  try {
    // Test database connection health
    await db.raw('SELECT 1');
    res.status(200).json({ status: 'healthy', timestamp: new Date() });
  } catch (err) {
    res.status(500).json({ status: 'unhealthy', error: err.message });
  }
});
Connect /healthz to external uptime monitors like Better Stack, UptimeRobot, or Pingdom for instant SMS/PagerDuty alerts when an outage occurs.
2. Application Performance Monitoring (APM) & Error Tracking
- Sentry / Bugsnag: Catch unhandled exceptions, promise rejections, and stack traces automatically in production.
- Datadog / New Relic / OpenTelemetry: Instrument HTTP latency, database query bottlenecks, and event loop lag metrics.
12. Production Checklist
Before calling it a day, run through this quick checklist:
- Bare repo initialized in
/var/repo/my-app.git. - App folder created in
/var/www/my-app. -
post-receivehook set to executable (chmod +x). - Explicit
$PATHincluded inside the hook script. - PM2 set up with
instances: 'max'andexec_mode: 'cluster'. - Nginx reverse proxy configured and SSL certificates enabled.
-
.envfile created directly inside/var/www/my-appwithchmod 600permissions. - Log rotation configured via
pm2-logrotate. - PM2 configured to survive server reboots (
pm2 startup&&pm2 save).
13. Frequently Asked Questions
What’s the difference between pm2 reload and pm2 restart?
pm2 restart kills the running Node process before starting a new one, causing a 2–5 second outage. pm2 reload boots up new worker instances in parallel, waits until they are ready to handle requests, and then gracefully closes the old ones.
What if npm install fails during deployment?
Because we included set -e at the top of the post-receive script, Bash will stop executing immediately if npm install returns an error code. PM2 will never execute the reload step, keeping your existing live workers running on the previous stable code.
Can I use Docker for deploying Node.js apps instead of PM2?
Yes! Git hooks + PM2 are ideal for lightweight single-server VPS setups. For microservice architectures or multi-cloud infrastructure, Docker containers provide consistent, reproducible build environments.
Here is a lean multi-stage production Dockerfile for Node.js:
# --- STAGE 1: Build ---
FROM node:20-alpine AS builder
WORKDIR /app
COPY package*.json ./
RUN npm ci
COPY . .
RUN npm run build --if-present

# --- STAGE 2: Runtime ---
FROM node:20-alpine AS runner
WORKDIR /app
ENV NODE_ENV=production
USER node

COPY package*.json ./
RUN npm ci --only=production
COPY --from=builder /app/dist ./dist

EXPOSE 3000
CMD ["node", "dist/index.js"]
How do I automate deployments using GitHub Actions CI/CD?
Instead of pushing directly from your local laptop, let GitHub Actions run automated unit tests and linting first. Once tests pass on main, GitHub Actions pushes your code to your server’s Git bare repository over SSH:
# .github/workflows/deploy.yml
name: Production CI/CD Deployment

on:
  push:
    branches: [ main ]

jobs:
  test-and-deploy:
    runs-on: ubuntu-latest
    steps:
      - uses: actions/checkout@v4

      - name: Setup Node.js
        uses: actions/setup-node@v4
        with:
          node-version: 20
          cache: 'npm'

      - name: Install & Run Tests
        run: |
          npm ci
          npm test

      - name: Deploy to Server via SSH
        uses: webfactory/[email protected]
        with:
          ssh-private-key: ${{ secrets.SSH_PRIVATE_KEY }}

      - name: Push to Server Bare Repo
        run: |
          mkdir -p ~/.ssh
          ssh-keyscan -H ${{ secrets.SERVER_IP }} >> ~/.ssh/known_hosts
          git remote add production deploy@${{ secrets.SERVER_IP }}:/var/repo/my-app.git
          git push production main
14. Deploy & Scale with SiliconPin
👉 Deploy Your Node.js App on SiliconPin Today
Subhodip Ghosh
Engineering, systems programming, and curated technology insights.